

There are two ways to mark an item as sold, depending on whether you want the sale recorded in your Sales History.
Option 1 (recommended): use the Sell Item tool
The Sell Item tool records the sale in your Sales History (date, price, sales channel, and optionally the customer) and updates the item's quantity and status for you. Sales recorded this way appear in your Sales reports.
- Open Inventory › Manage Inventory, find the item with Find by SKU or Keyword Search, and click the Edit (pencil) icon.
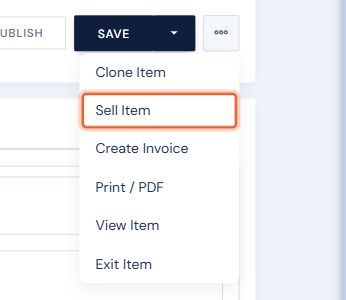
- Click the … menu next to Save (top right) and choose Sell Item.
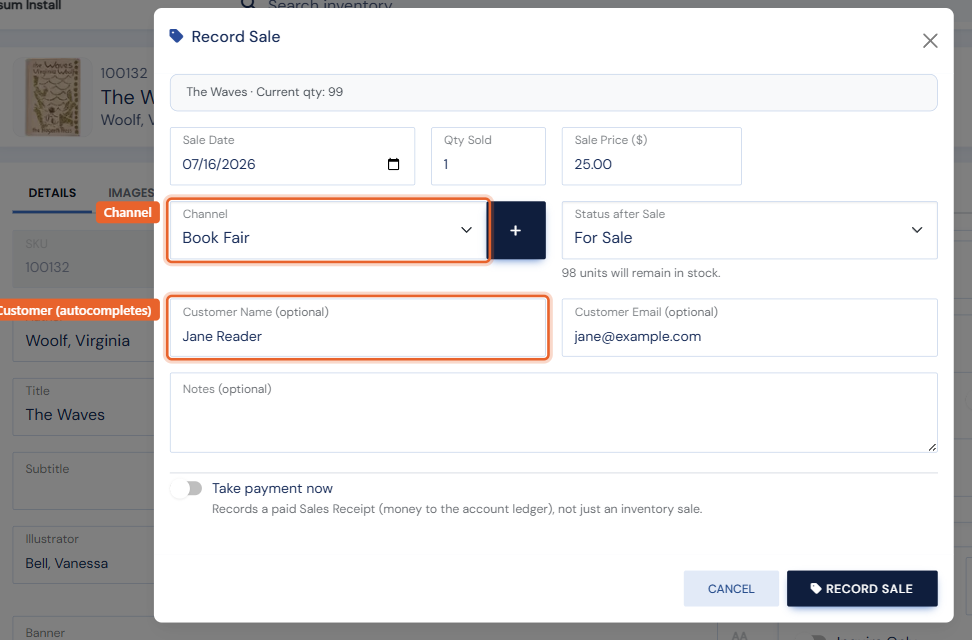
- Enter the sale details in the Record Sale window: date, quantity, amount, and Channel (for example Manual / In-Store). You can also attach the customer's name and email — if they have an account, the autocomplete will find them.
- Click Record Sale. The quantity is reduced, the status is updated, and the sale appears on the item's Sales tab and in your Sales reports.
Option 2 (quick): lower the quantity
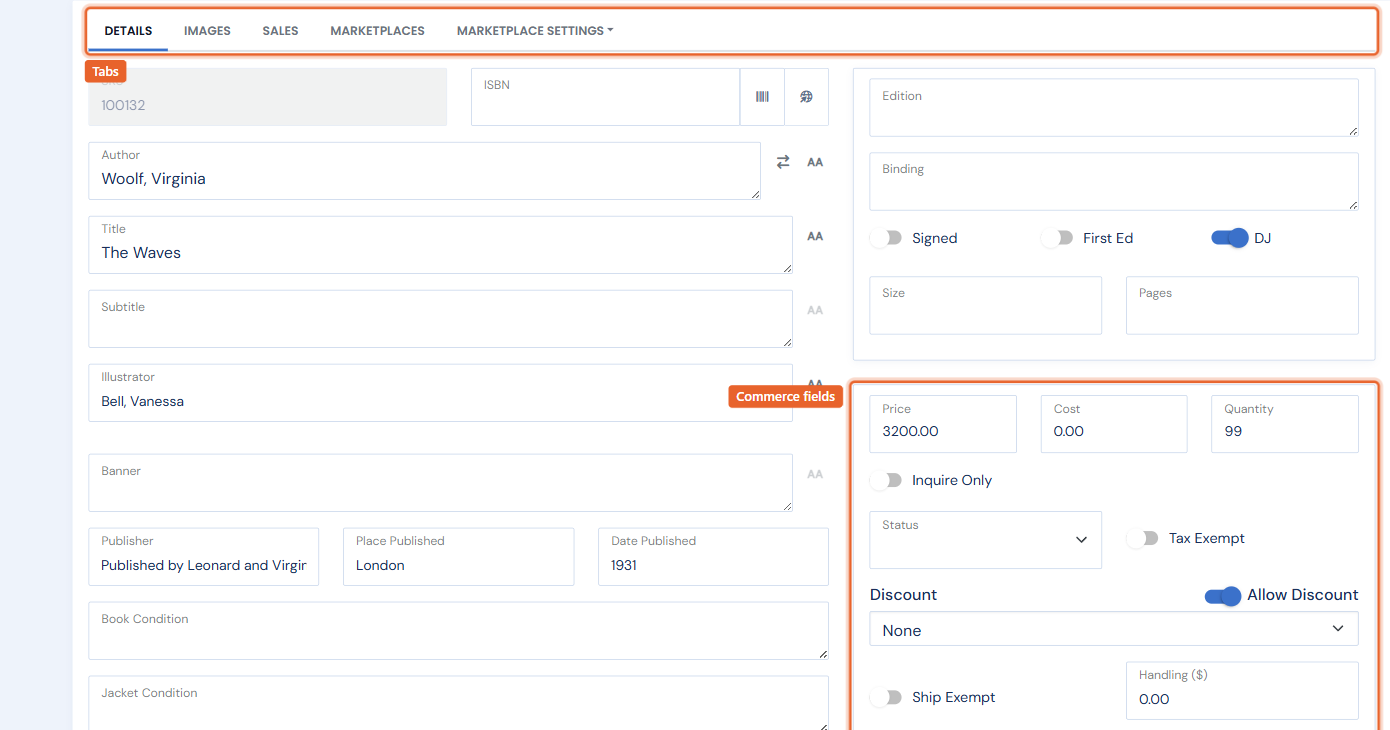
If you just need to reduce the quantity without recording sale details, open the item and lower the Quantity field in the commerce column, then click Save. Set it to 0 and the item's status updates to sold/unavailable automatically.
Note: Option 2 does not create a Sales History record, so the sale will not appear in your Sales reports. Use the Sell Item tool if you want the sale tracked.