

Uploading images straight to an item is the easiest way to add photos, because BookRouter names the files for you — there is no need to match filenames to SKUs.
Step one: Open the item
Open the item's edit page from Inventory › Manage Inventory (click the Edit pencil on its row). See Adding and editing books if you need a hand finding it.
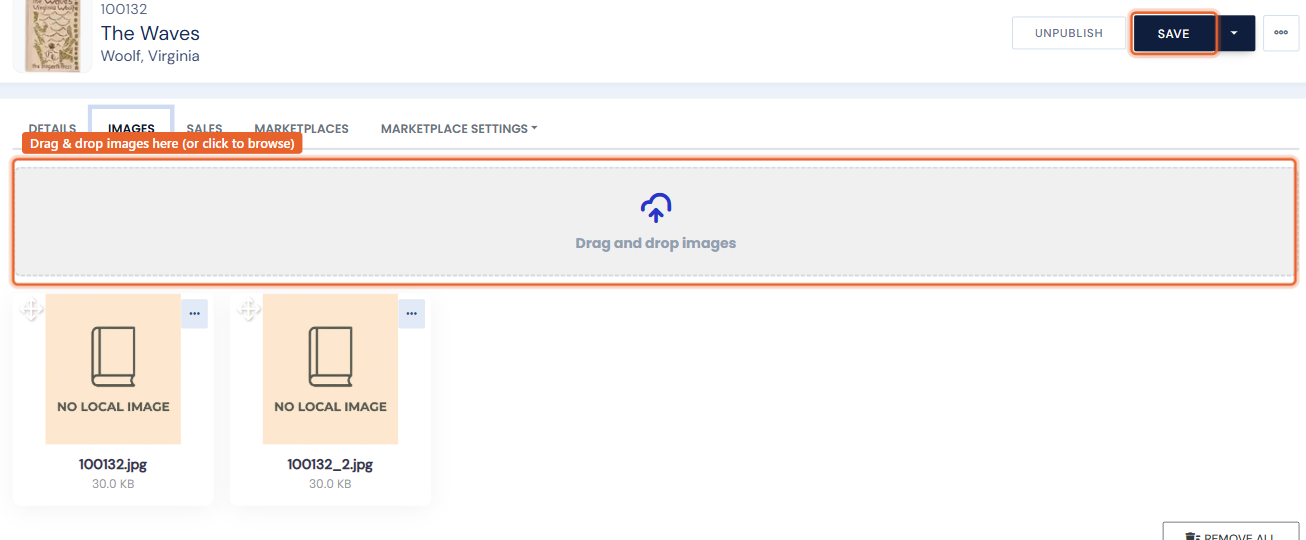
Step two: Add images on the Images tab
Click the Images tab, then drag and drop your image files onto the upload area (or click it to browse). Thumbnails appear as they are added; drag a thumbnail to reorder, and the first image is the primary one.
Step three: Save
Click Save (top right) to finalize. Images are processed automatically and usually appear on your website within a few minutes.
Have a whole folder of photos to load at once? See Bulk uploading images instead — but note that bulk uploads require filenames that match each item's SKU.